The Travelling Loop or Single Loop for small circumference knitting
This method is used for knitting in the round when a circular needle is too long for the work e.g. you only have a 32″ / 80 cm needle but are knitting a hat. This method does not work for very small circumference knitting such as socks.
Not everyone loves Magic Loop. Not everyone will love this method either, but it’s an option for some of us. This is a technique I “un-vented” while knitting the hat in the example; I’m sure it’s been around in the knitting world — I lay no claim to originality — but I haven’t seen it written up anywhere else, so here goes.
Starting Travelling Loop:
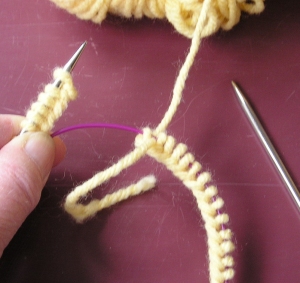 |
Note: I am a right-handed Continental knitter; Long-tail cast-on was used for this example.
Cast on the required number of stitches.
Push the cast-on stitches to the left tip of the circular needle.
Bring the cord down (either in front of or behind the work — it doesn’t matter as long as you don’t “trap” the working yarn) and around to the right to bring the right tip of the circular needle to meet the left tip.
<<Picture: the stitch that was cast on first is at the left tip of the needle, the last cast-on stitch (the one with the tail yarn) is on the cable. The right tip of the circular needle is seen lying to the right in the picture. |
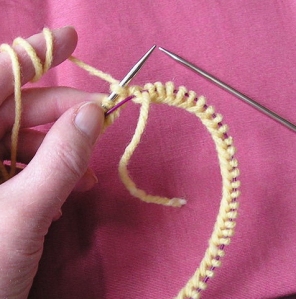 |
Adjust the cable until it brings the stitches together, ready to knit. |
Working the Travelling Loop:
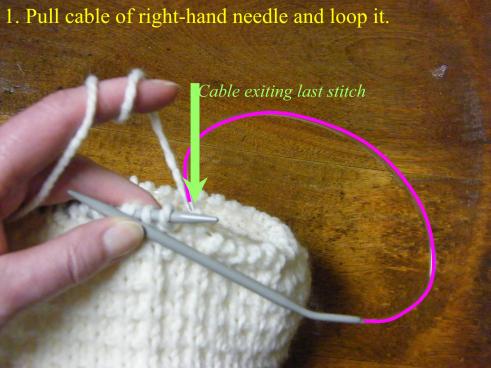
|
Step 1: Position stitches on the Left-hand needle, ready to knit.Pull the right-hand needle and cable and curl it into a loop as shown in picture. You can curl it toward the inside of the work as shown here or to the outside. Makes no difference.
Be sure that the cable doesn’t “capture” the yarn i.e. the yarn should not be wound around the cable in any manner. |
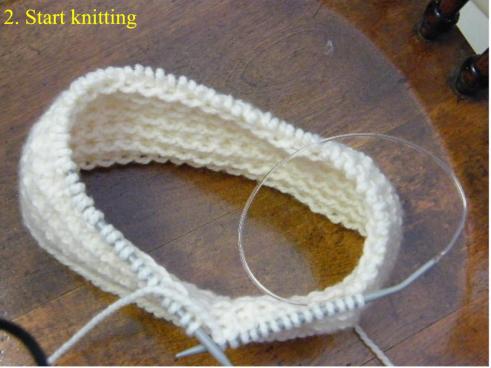
|
Step 2: Start knitting |
|
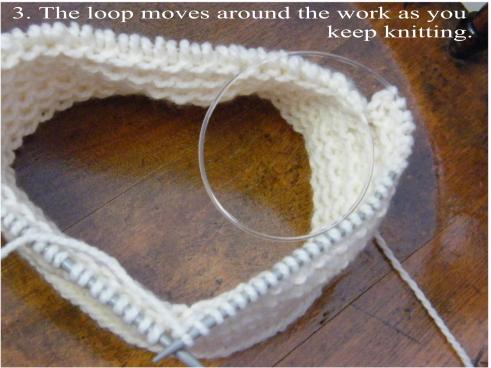
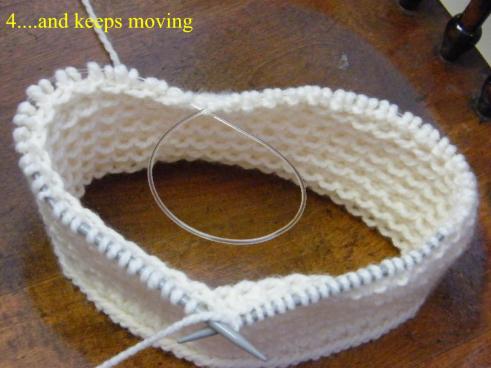
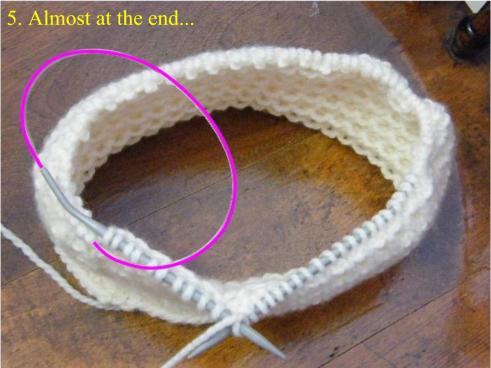
|
Steps 3 – 5 show the loop moving around the work as you work.
You just knit (or purl or whatever) and the loop does its own thing — it knows!! |
|

|
Step 6: When you knit the last stitch from the left needle, the entire loop will be at that end of the needle and ready to uncoil. |
|
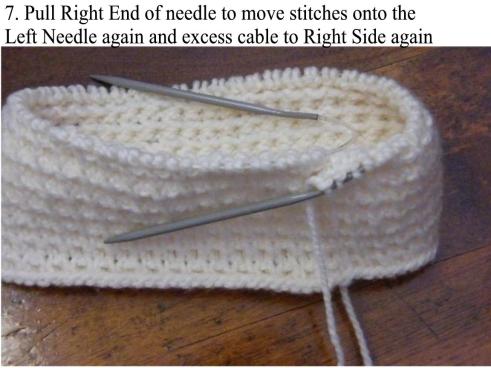
|
Step 7: Pull the Right-hand needle and cable just like in Step 1, rearranging the stitches so that they slide to the tip of the Left-hand needle, ready to knit another round. |

|
….and we’re right back to Step 1, ready to start the next round. |
*March 28.2009:
A note of thanks to fellow Raveler notesandstitches for two wonderful suggestions: 1. a new name for this method: Travelling Loop (since the extra cable travels around the work as you knit) and 2. for the observation that this method actually has a built-in end of round marker — the travelling loop itself! Brilliant! Thanks notesandstitches for letting me share here!


I am so excited to have found this new knitting site and all the patterns in “impeccableknits.ca”!
Cannot wait to try your patterns.
See you on Ravelry
Aka MyGinger